Are you looking for all in one social media management platform? If so, the Radaar review is what you need.
Radaar is a platform that allows you to manage your social media accounts effectively. It lets you see all messages and comments of various social media platforms on one site. You do not need to use many platforms to interact with your audience. Manage every platform with a single tool.
It also enables you to watch your audience, gives statistics based on various aspects of channels, plans your upcoming post, establishes links, and much more.
I hope learning about the main functions of Radaar astounds you. Let me go into more depth about Radaar and how to use it to your benefit. Let us proceed to examine the tool in more depth.
Table of Contents
ToggleWhat is Radaar?
Radaar is a platform that allows you to integrate all of your messages and comments in one location, allowing you to remain more organized and save time. With Radaar, you can now help streamline your social media management.
Personalize your content, post routinely, and communicate with your audience efficiently. Radaar enables you to control your social media platforms from a single platform.
This platform lets you publish, interact, monitor, and evaluate your social networking sites. It brings all of the work together in a single location. It assists marketers at every stage, from planning and producing content to assessing their efforts.
Radaar is excellent for community managers, social media and digital marketing companies, startups, freelancers, and anyone who seeks a way to interact with followers, generate new content, and assess performance efficiently and productively.
Radaar Review: How Does Radaar Works?
Keeping all the networking sites organized is one of the keys to successful social media marketing. This is where Radaar can help you. Let me show in detail how it works.
Dashboard
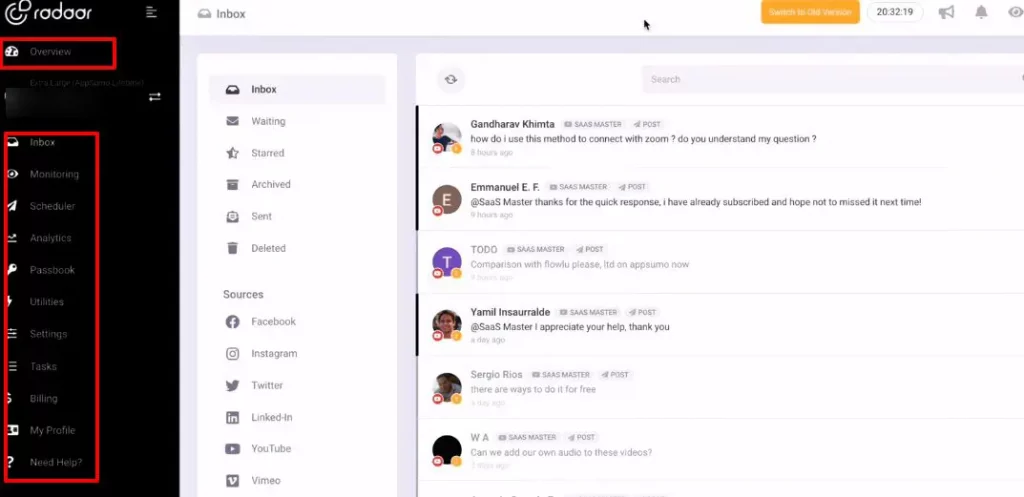
Radaar’s workspace is similar to the image. It is linked to several social media networks, allowing you to see them all in one spot. That is the beauty of it. It is all about saving time.
To get acquainted with this technology, I will go into every menu option on the left side of the dashboard.
Settings
The first step is to link your social accounts. So, go to Settings > Channels >Connect.
You will discover a list of social media channels. This is where we will link our channels or social media networks.
You may connect to Radaar via any of the various options. In the list, you will find Facebook (page), Facebook (Group), Instagram (business), messages, and other channels option.
Inbox
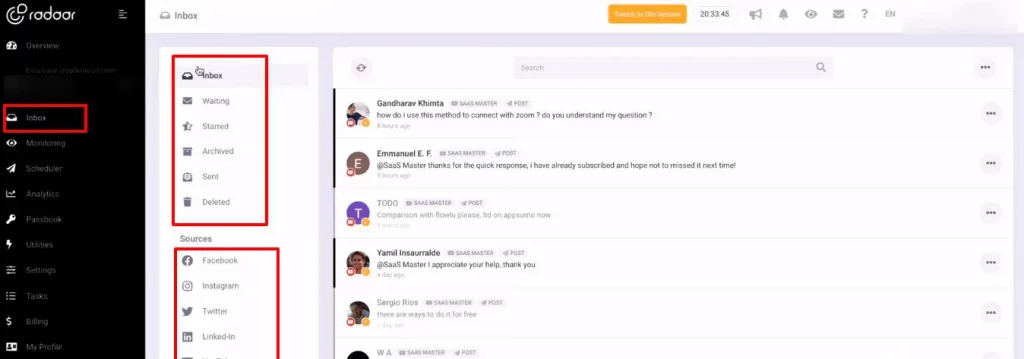
You will discover options for Inbox, monitoring, and analytics on the left side. Once you link your social media accounts, you will be able to receive messages from Radaar. To do so, go to Inbox> Inbox.
The UI is similar to Gmail in that you can view your inbox, pending messages, starred messages, archives, and sent and deleted messages.
After that, you can see messages from sources like Facebook, Instagram, Twitter, and other platforms in a single location if you have linked those accounts.
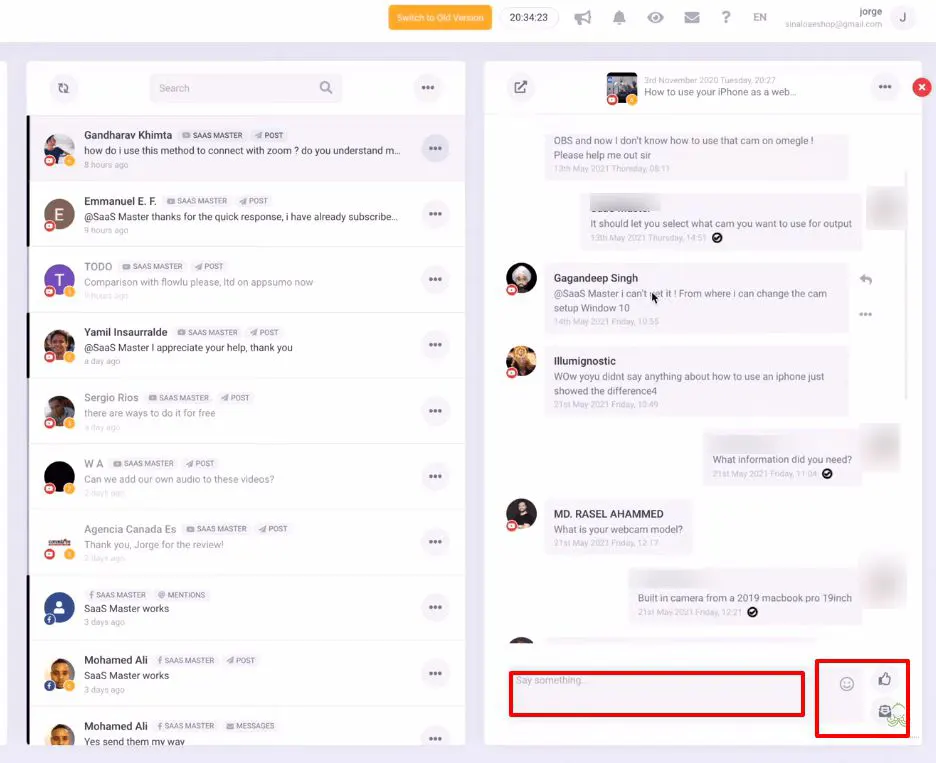
If you click on any specific messages, an interface will appear. You are engaging with the comments of the audience in this interface. You may send a like, emojis, and view the timing of the comment.
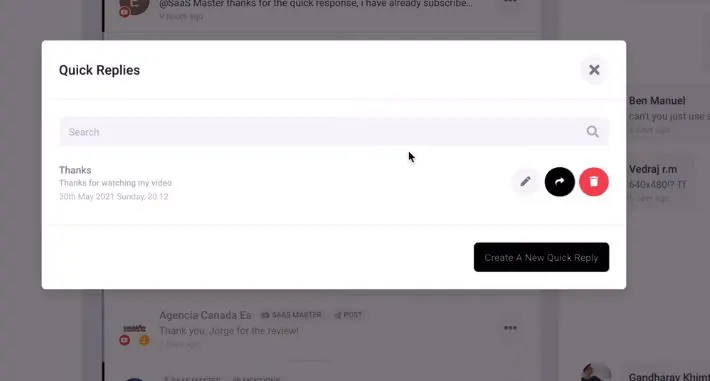
It also offers the option of responding quickly. You may provide a brief name of the message and also add a lengthy message. This lets you save time since you don’t have to write when you respond to your audience.
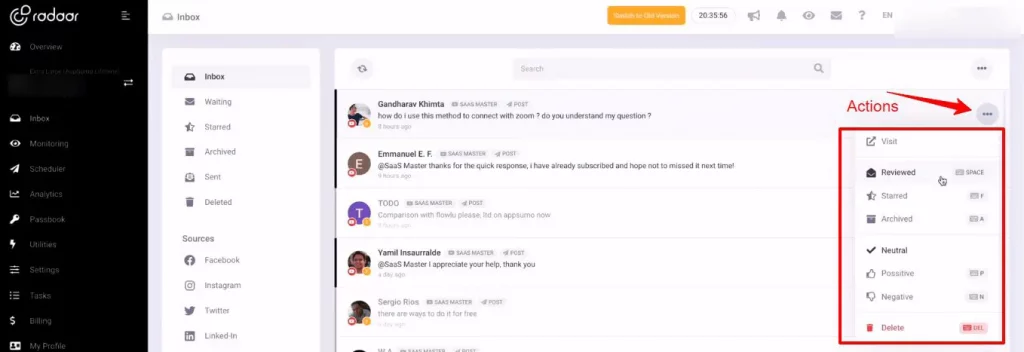
We have the action choice for each person. Visit, Reviewed, Starred, and Archived are all options under Actions.
You may use your keyboard to reach the action choice. For example, hit F on your keyboard if you wish to start a message. However, there are also neutral, positive, negative, and removal alternatives.
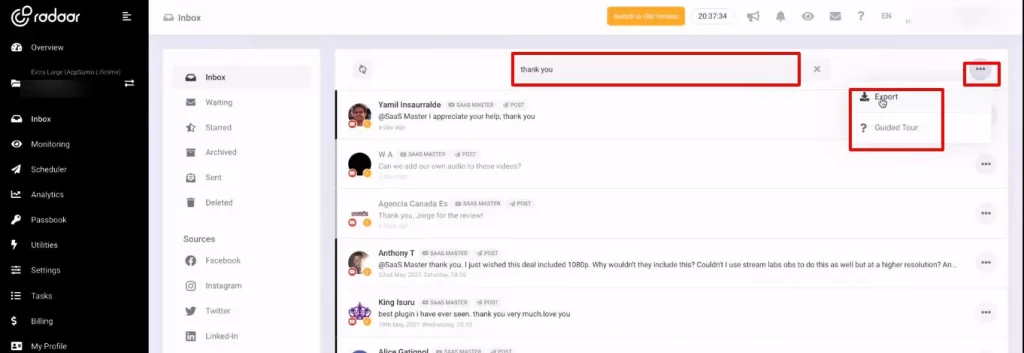
There is a search option to make things simpler. For instance, if you seek a specific term, type it into the search field and hit enter. It will filter out all of that channel’s messages and display the precise matches. Then you will be able to export all of the results.
Monitoring
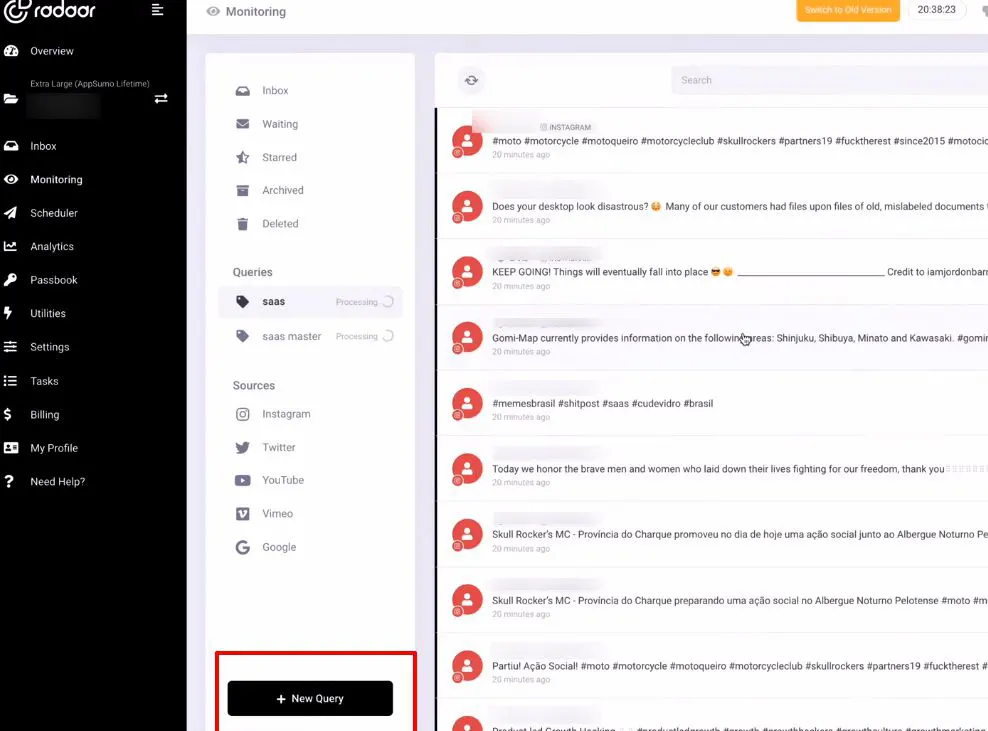
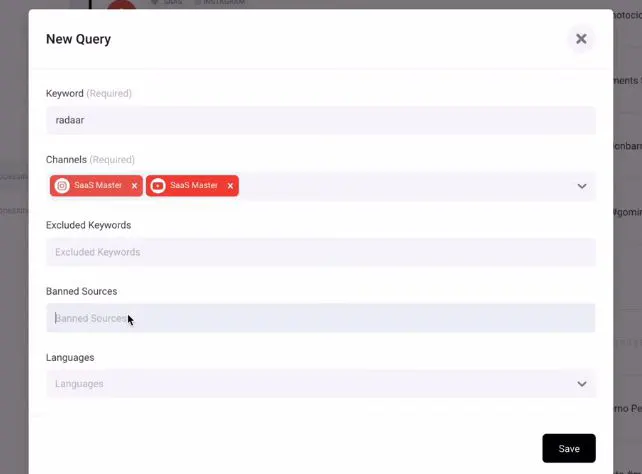
Another option is Monitoring. Monitoring informs you of who is referencing you or the term you choose. However, you must enter the keyword correctly.
When you click on your accounts, you may see the comments that mention you or the keyword you have added.
Select New Query from the bottom menu. Then a pop-up will appear to add keywords, channels, Excluded keywords, Banned sources, and languages.
You will be sent to a page depending on the term you choose. The page displays all of the mentions in the monitoring section.
Scheduler
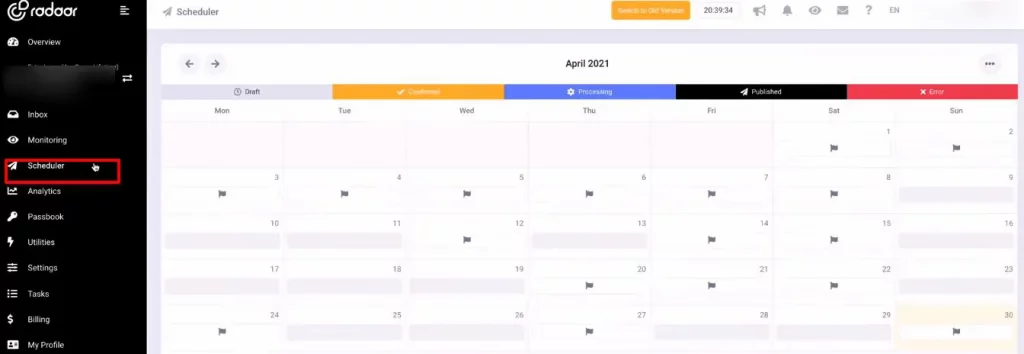
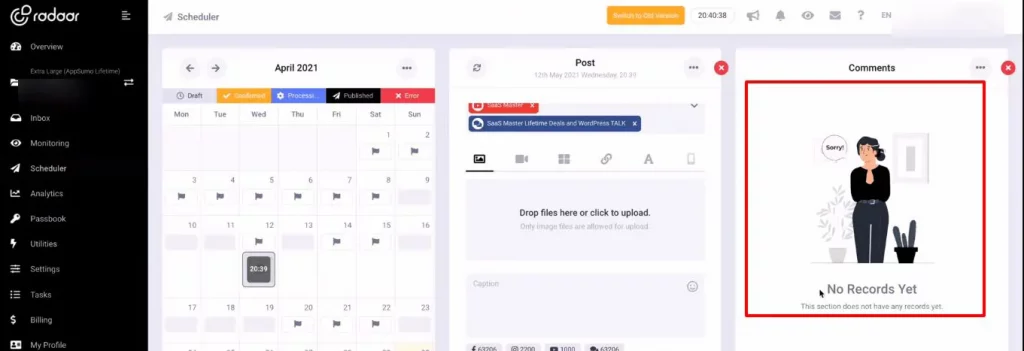
The next step is to create a schedule. You may schedule your social media profiles using it.
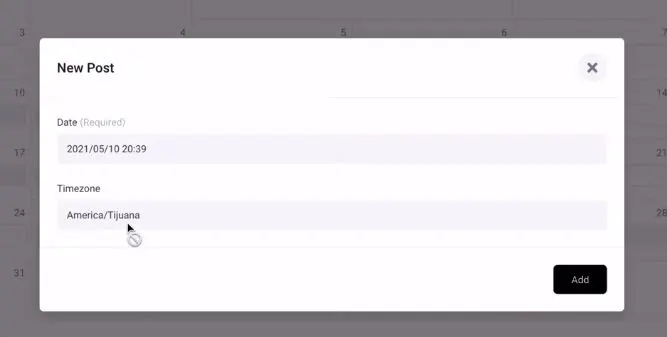
Select the specific date by clicking on the calendar. When you click on a given day, a pop-up window will display. It contains the date and time. Choose based on your preferences.
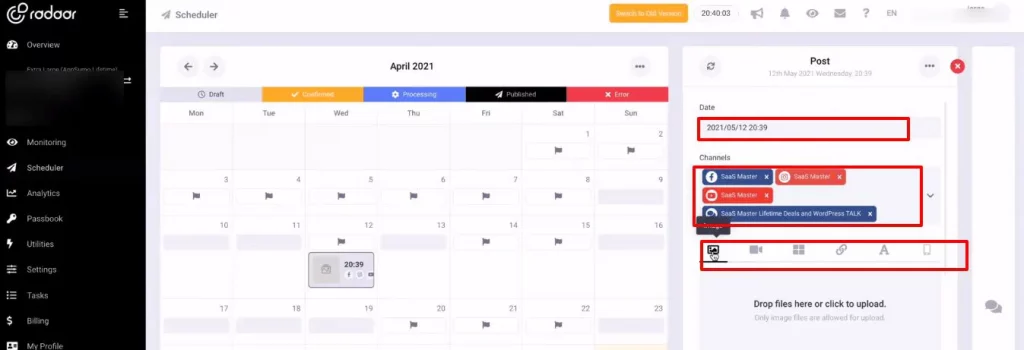
Then the option of selecting a date, connecting channels, and writing the post will appear.
To make a post, you may include photographs, videos, a gallery, a link, text, and a narrative. Add a description, locations, and comments, as well as the ability to shorten the URL and get a notice when the post is complete. You may also monitor comments right here.
Analytics
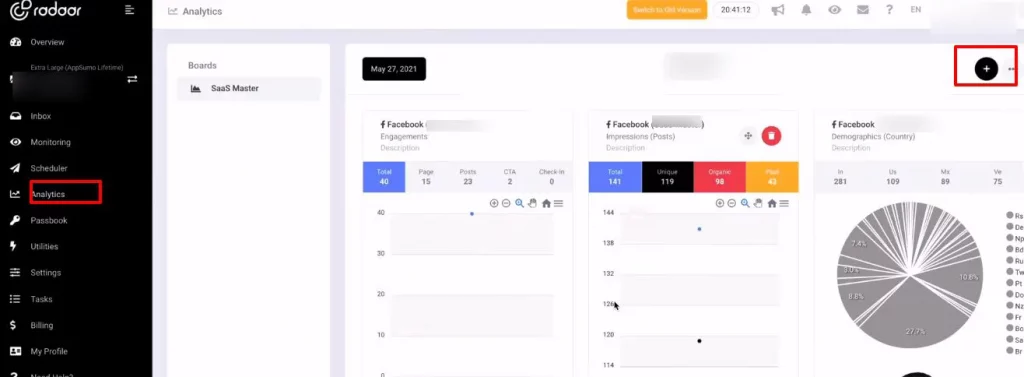
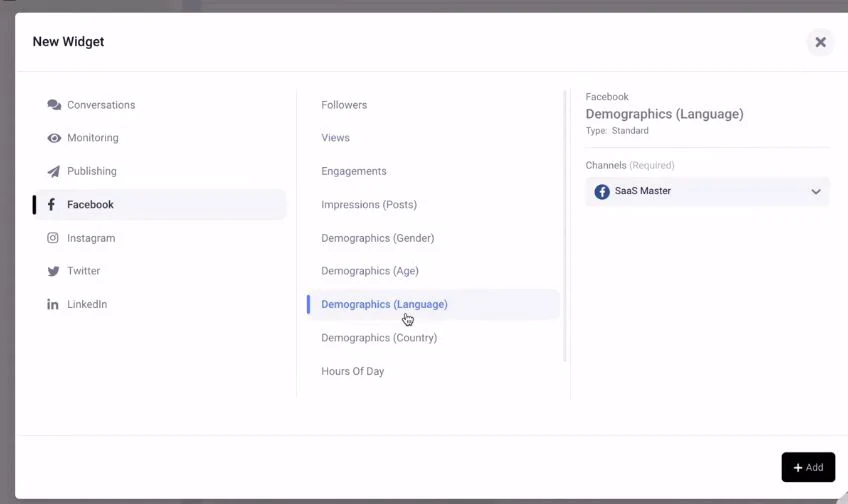
We shall then talk about analytics. A pop-up will appear if you wish to add a new widget in this situation. You may now specify your analytics timeframe.
If you choose Facebook, for example, you may get stats for followers, views, engagement, impressions, demographics, and hours of the day.
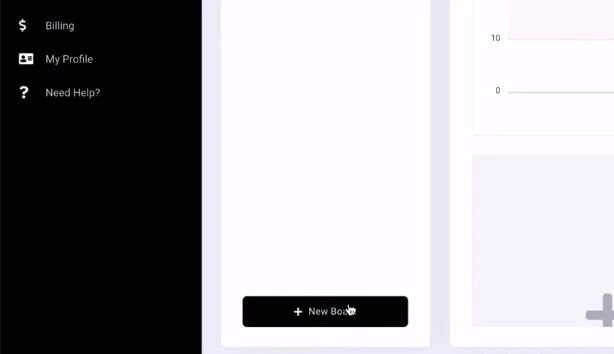
Add the analytics one by one, using the option for “New Board” for the various metrics we want. You may create a board for specific channels and widgets for other possibilities.
Passbook
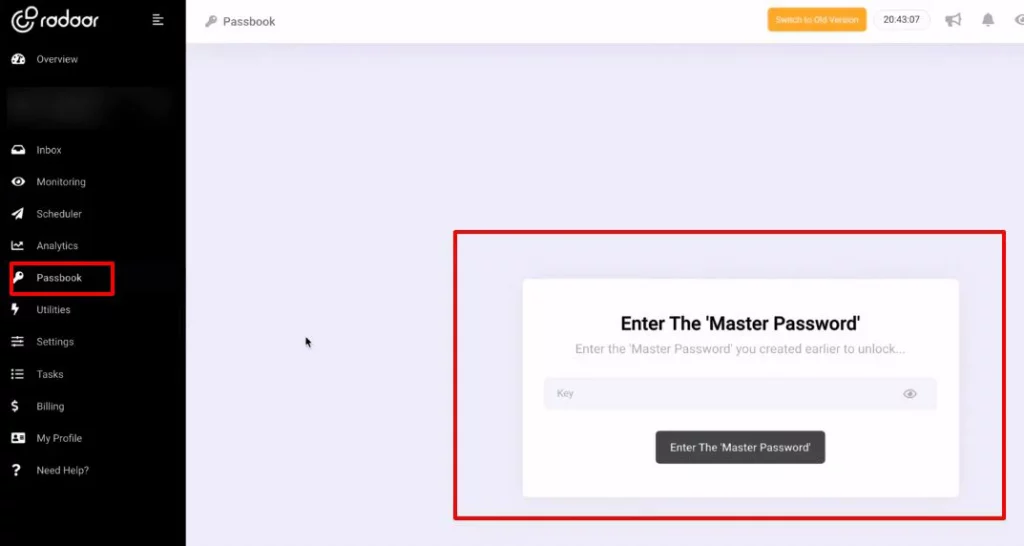
Then there is “Passbook.” It enables you to configure Radaar’s master password. Because Radaar does not know the password, it is vital to remember it.
Utilities
Then there is the choice of utilities. We have a URL shortener and guest management here. This is where you will find the links to your Radaar-created posts and essential information such as clicks and when the material was updated.
This is how Radaar operates. The most significant of these choices is a consolidated inbox.
Pricing
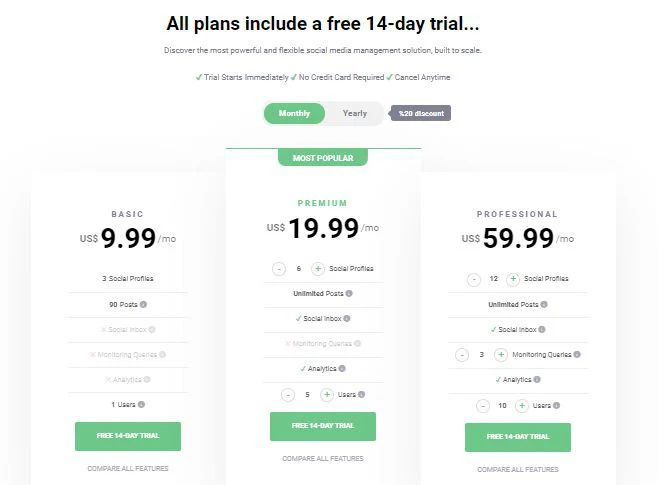
Other than the 14-day free trial, Radaar offers three price options. The monthly fees for the Basic, Premium and Professional plans are US$ 9.99, $ 19.99, and $59.99, respectively. They also offer annual plans that cost $ 7.99/yr, $ 15.99/yr, and $ 47.99/yr.
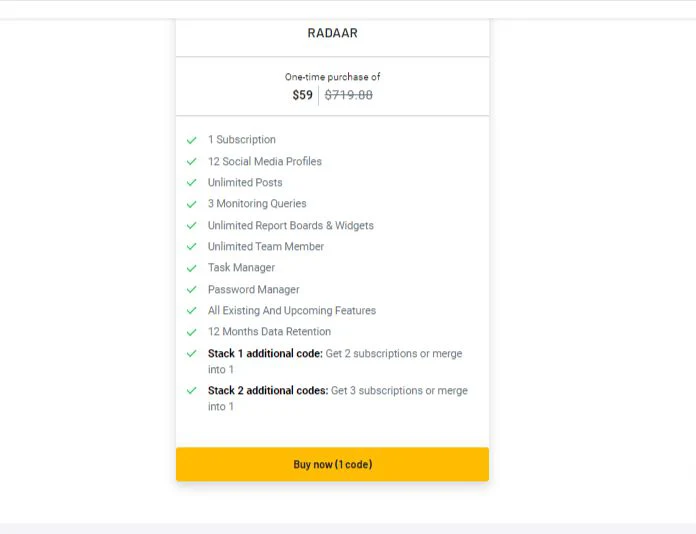
Will you let it go if you can have this incredible product for a one-time, cheaper price purchase? Anyway, I won’t. Radaar is available through Appsumo for only $59 with a 60-day money-back guarantee.
This deal offers customization of 12 social networking sites and single membership. You can create an endless number of posts, boards, widgets, and team members. Appsumo will send all future Radaar upgrades to you with this lifetime purchase. This is a fantastic offer at such a low price.
Final Verdict
If you know why social media is an important part of inbound marketing, then you will focus on the integration of networking sites. Radar is a tool that helps in the integration of different networking sites.
I hope that my Radaar review has persuaded you that Radar is the social media management tool that has all you need in it. You’ll be able to manage all your social media profiles from one location, making it easier to stay organized and increase your output. This is all in one social media management platform.
Don’t forget to let me know whether you agree that Radaar is an incredible piece of software. Also, please tell me what you think about radaar.

